 Kia Sorento: Front Driveshaft Repair procedures
| 1. |
Disconnect the (-) battery terminal.
|
| 2. |
Remove the front wheel and tire.
(Refer to Suspension System - "Wheel")
|
| 3. |
Separate the stabilizer bar link (B) from the strut assembly after removing the nut(A).
Tightening torque :
98.0 - 117.6 N·m (10.0 - 12.0 kgf·m, 72.3 - 86.7 lb·ft)
|
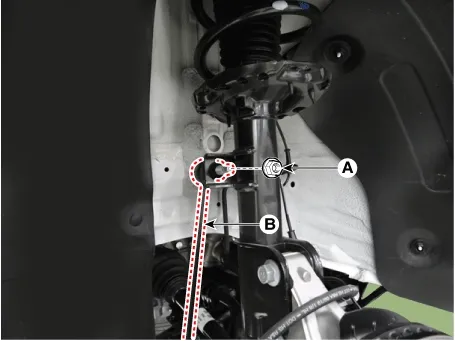
|
•
|
When removing the nut, fix the outer hexagon of stabilizer bar link.
|
|
•
|
Be careful not to damage the stabilizer bar link boots.
|
|
|
| 4. |
Disconnect the tie rod end ball joint from the knuckle by using the SST (09568-2J100).
| (1)
|
Remove the split pin (A).
|
| (2)
|
Remove the lock nut (B) and washer (C).
Tightening torque :
98.1 - 117.7 N·m (10.0 - 12.0 kgf·m, 72.3 - 86.8 lb·ft)
|
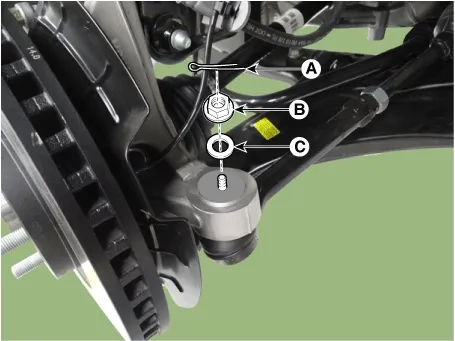
|
Do not reuse mounting nut.
|
|
| (3)
|
Disconnect the tie rod end ball joint from the knuckle by using the SST (09568-2J100).
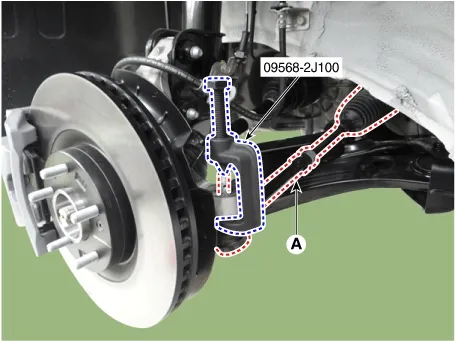
|
|
| 5. |
Remove the lower arm mounting nut (A).
| (1)
|
Remove the split pin (A).
|
| (2)
|
Remove the lower arm mounting bolt (B), nut (C) and washer (D).
Tightening torque :
98.1 - 117.7 N·m (10.0 - 12.0 kgf·m, 72.3 - 86.8 lb·ft)
|
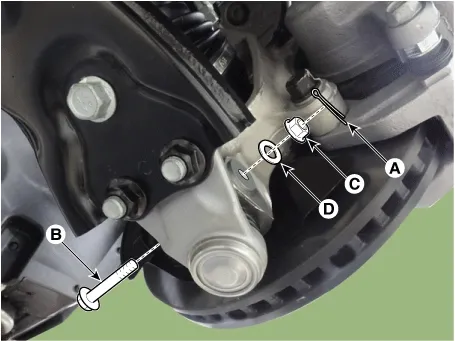
|
To remove the nut (C), fix the bolt (B) on the opposite side to prevent it from turning.
|
|
|
| 6. |
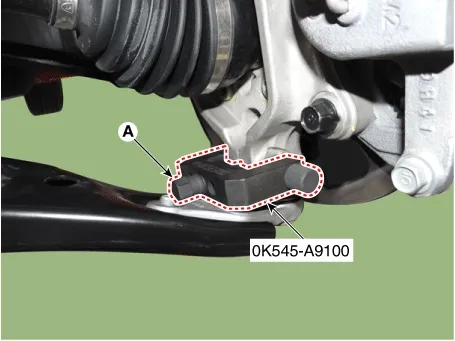
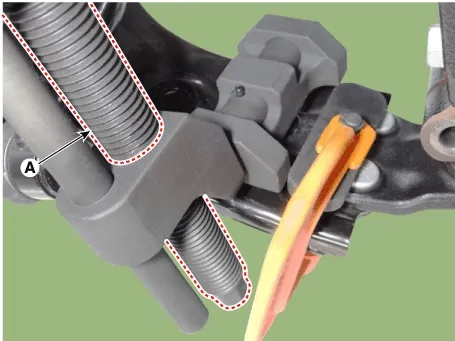
Disconnect lower arm ball joint from the knuckle by using the SST (0K545-A9100).
| (1)
|
After removing bolts from the front knuckle, install and tighten the sub body bolt (A)
|
| (2)
|
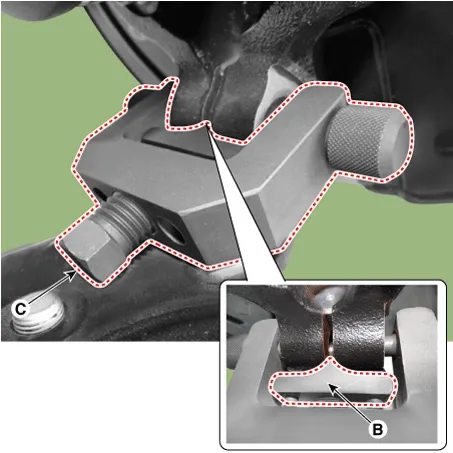
Input the sub body (B) between the front knuckle and the sub body bolt.
|
| (3)
|
Tighten the bolt (C) of the sub body to broaden the gap of the front knuckle.
|
| (4)
|
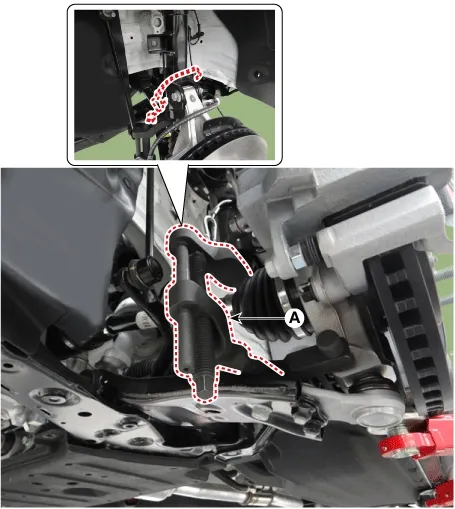
Install the safety wire and main body (A) between the front strut and the lower arm.
|
| (5)
|
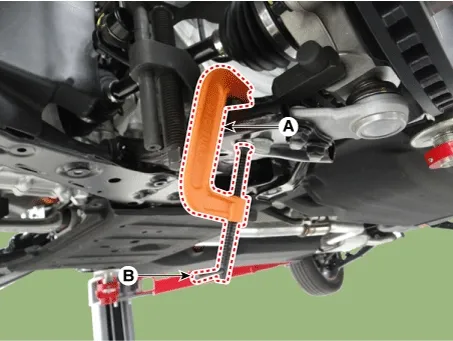
After installing C clamp (A), rotate the handle (B) clockwise until the clamp is fixed on the lower
arm.
|
| (6)
|
Tighten the main body bolt (A) slowly and remove the lower arm from the front knuckle.
|
|
| 7. |
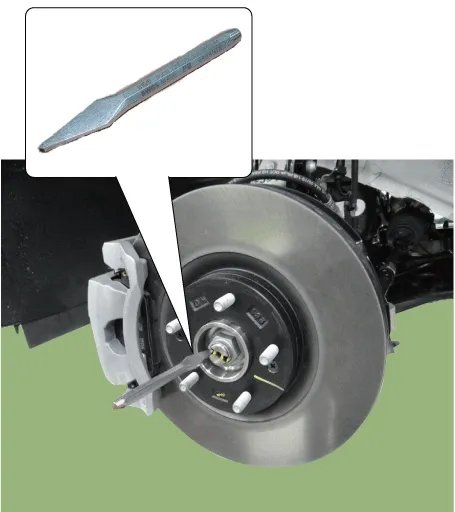
By hammering on a chisel, unlock the driveshaft lock hub nut caulking.
|
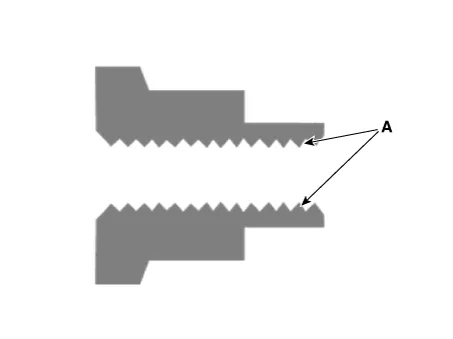
If there is screw thread (A) on the end of the nut, unlock the caulking by using a chisel and then
remove the nut to prevent damaging driveshaft screw thread.
|
|
| 8. |
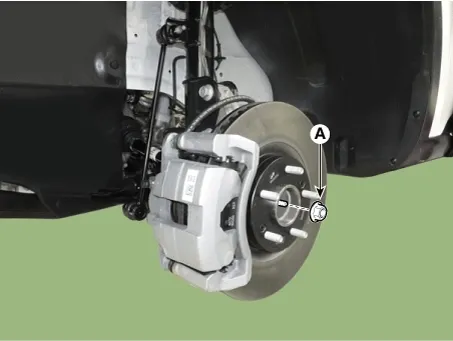
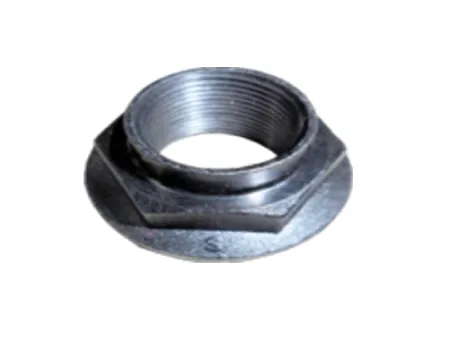
Remove the caulking nut (A) from the front axle.
Tightening torque :
294.2 - 313.8 N·m (30.0 - 32.0 kgf·m, 217.0 - 231.5 lb·ft)
|
|
•
|
The driveshaft lock nut must be replaced with new one. When replacing the drive lock hub
nut, use only the nut with screw thread (A) on the end.
|
|
•
|
When replacing the drive lock hub nut, use only the nut with screw thread (A) on the end.
|
|
•
|
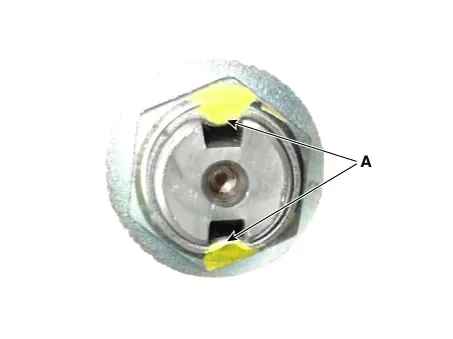
Tighten the driveshaft lock hub nut to the specified tightening torque, and caulk by using
a chisel and hammer.
|
|
•
|
If there are two key seats, perform on all two seats.
Caulking depth (A) : 1.5 mm (0.0591 in)
|
|
|
|
| 9. |
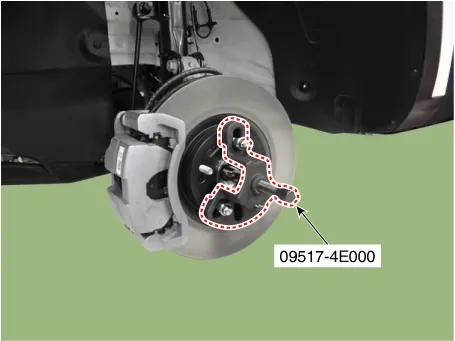
Disconnect the driveshaft from the axle hub by using the SST (09517-4E000).
|
Removing the driveshaft, do not force pull or over deflect the axle.
|
|
| 10. |
Remove the engine room under cover.
(Refer to Engine Mechanical System - "Engine Room Under
Cover")
|
| 11. |
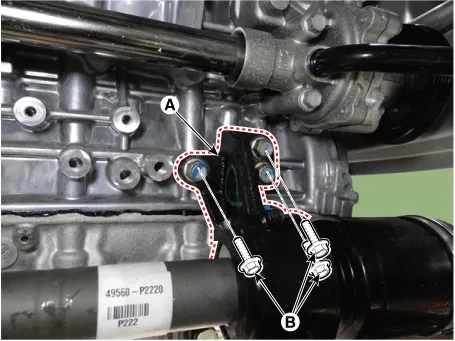
Remove the mounting bolts (B) of the inner shaft bearing bracket assembly (A) and remove the inner shaft.
Tightening torque :
49.0 - 68.6 N·m (5.0 - 7.0 kgf·m, 36.1 - 50.6 lb·ft)
|
|
| 12. |
Remove the driveshaft (B) by using a pry bar (A).
[LH]
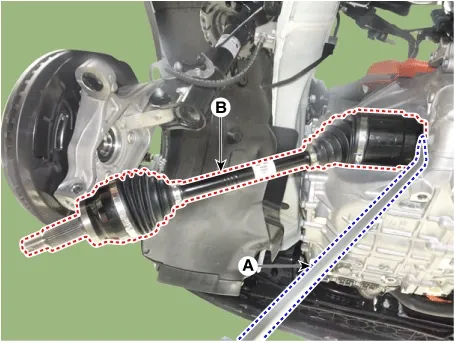
[RH]
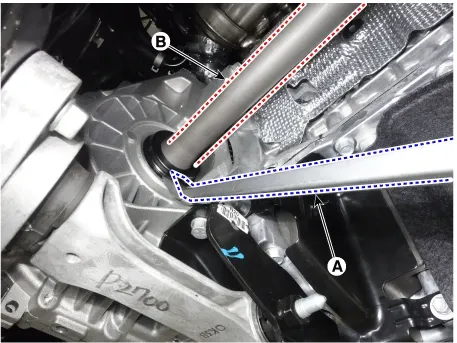
|
•
|
Do not insert the pry bar too deep, as this may damage the oil seal.
|
|
•
|
Do not pull the driveshaft by excessive force as it may cause components inside the joint
kit to dislodge resulting in a torn boot or a damaged bearing.
|
|
•
|
When using the pry bar, be careful not to damage the transaxle and joint.
|
|
•
|
Plug the hole of the transaxle case with the oil seal cap to prevent contamination.
|
|
•
|
Replace the retainer ring whenever the driveshaft is removed from the transaxle.
|
|
|
| 1. |
Check the driveshaft boots for damage and deterioration.
|
| 2. |
Check the driveshaft spline for wear or damage.
|
| 3. |
Check that there is no water or foreign material in the joint.
|
| 4. |
Check the spider assembly for roller rotation, wear or corrosion.
|
| 5. |
Check the groove inside the joint case for wear or corrosion.
|
| 6. |
Check the dynamic damper for damage or cracks.
|
| 1. |
Install in the reverse order of removal.
|
Components
1. Front driveshaft (LH)2. Inner shaft bearing
bracket
3. Front driveshaft (RH)...
Components
1. Wheel side joint assembly2. Wheel side
circlip3. Wheel side boot band4. Wheel side boot
5. Shaft6. Transaxle side boot band7. Transaxle...


 Front Driveshaft Components and Components Location
 Joint Assembly (Transaxle side) Components and Components Location
