 Kia Sorento: Front Door Replacement
Second Generation XM (2011-2026) / Kia Sorento XM 2011-2026 Service Manual / Body (Interior and Exterior) / Exterior / Front Door Replacement
Front Door Trim Replacement
|

| 1. |
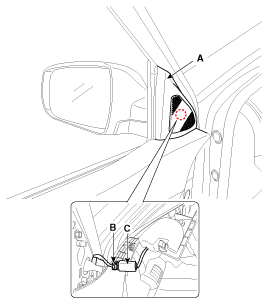
Using a screwdriver or remover, remove the quadrant inner cover
(A).
|
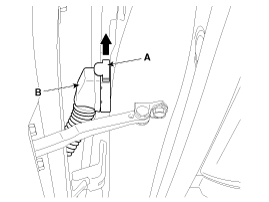
| 2. |
Push the lock pin (B), disconnect the tweeter speaker connector
(C).
|
| 3. |
Using a screwdriver (B), remove the door grip handle cover (A).
|
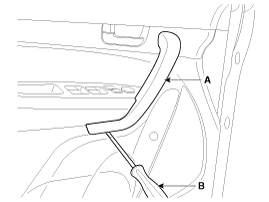
| 4. |
Using a screwdriver, remove the door inside handle cap (B).
|
| 5. |
After loosening the mounting screws, then remove the door trim
(A).
|
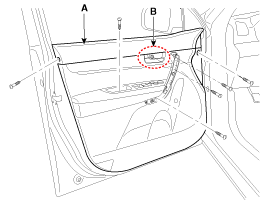
| 6. |
Push the hook (B), remove the inside handle cage (A)
|
| 7. |
Push the lock pin (A), disconnect the connectors (B).
|

| 8. |
Push the lock pin, disconnect the connectors (B).
|
| 9. |
Remove the door trim.
|
| 10. |
Install in the reverse order of removal.
|

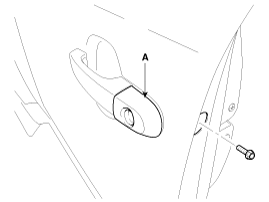
Inside Handle Replacement
| 1. |
Remove the door trim.
|
| 2. |
After loosening the mounting screws, then remove the inside handle
(A).
|
| 3. |
Install in the reverse order of removal.
|
Glass Replacement
| 1. |
Remove the front door trim.
|
| 2. |
Remove the glass mounting plug hole.
|
| 3. |
Carefully adjust the glass (B) until you can see the bolts, then
loosen them. Separate the glass from the glass run and carefully pull
the glass out through the window slot.
|
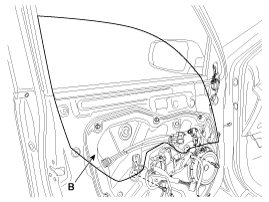
| 4. |
Install in the reverse order of removal.
|
Speaker Replacement
| 1. |
Remove the door trim.
|
| 2. |
Drill out the rivets to remove the speaker (B) from the door module.
|
| 3. |
Disconnect the speaker connector (A).
|
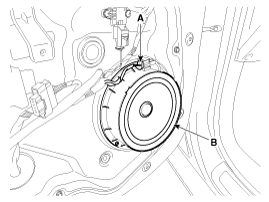
| 4. |
Install in the reverse order of removal.
|
Power Window Motor Replacement
| 1. |
Remove the door trim.
|
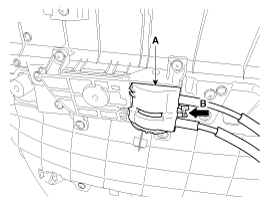
| 2. |
Disconnect the connector (A), then loosen the mounting screws.
|
| 3. |
Remove the power window motor (B).
|
| 4. |
Install in the reverse order of removal.
|
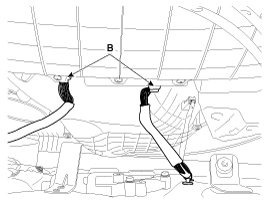
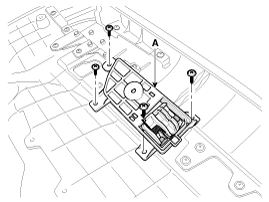
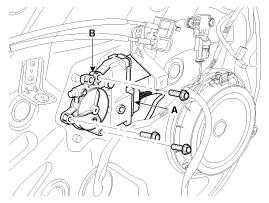
Door Module Assembly Replacement
| 1. |
Remove the following parts :
|
| 2. |
Loosen the outside handle base mounting screw (A).
|
| 3. |
Loosen the module mounting bolts.
|
| 4. |
After loosening the lach mounting screws, remove the module (A).
|

| 5. |
Push the lock pin (B), disconnect the connector (A).
|
| 6. |
Disconnect the clip (C).
|

| 7. |
Pull out the lock pin (A), disconnect the main connector (B).
|
| 8. |
Install in the reverse order of removal.
|
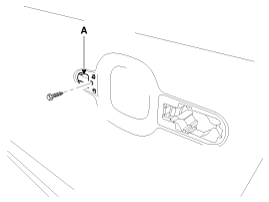
Outside Handle Replacement
| 1. |
Remove the cap, loosen the mounting bolt.
|
| 2. |
Remove the outside handle cover (A).
|
| 3. |
Remove the outside handle (A)
|

| 4. |
Installation is the reverse the removal.
|
 Front Door Components
1. Door grip handle cover
2. Door inside handle cap
3. Door trim
4. Door belt inner weatherstrip
5. Door module
6. Quadrant inner cover
7. Door belt weatherstrip
8. ...
 Front Door Adjustment
Glass Adjustment
ŌĆó
Check the glass run channel for damage or deterioration,
and re ...
See also:
Transaxle Control Module (TCM) Removal
When replacing the TCM, the vehicle equipped with the immobilizer
must be performed procedure as below.
[In the ...
Description
System Overview
The System offers the following features:
-
Human machine interface through a 1-stage button, for terminal
switching and engine start.
...
Shift Lever Removal
1.
Remove the floor console.
(Refer to Body - "Floor console")
2.
Remove the air duct.
3.
Dis ...
Categories
- Home
- First Generation
- Second Generation
- Kia Sorento XM 2011-2026 Owners Manual
- Kia Sorento XM 2011-2026 Service Manual

Copyright ® www.ksmanual.com 2014-2026