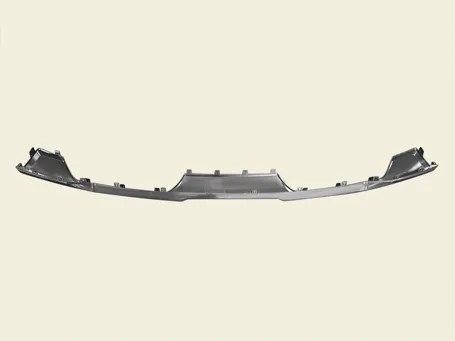
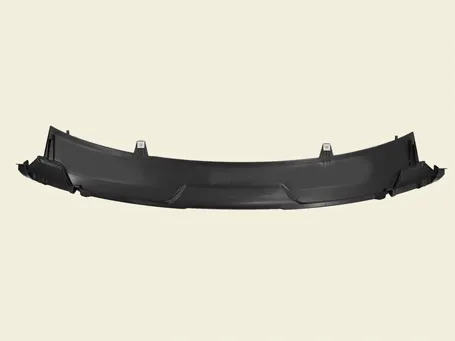
Kia Sorento: Front Bumper Assembly Repair Procedures - Bumper (Front) - Body (Interior and Exterior)Kia Sorento: Front Bumper Assembly Repair Procedures

Kia Sorento (MQ4, 2021-2026) Service Manual / Body (Interior and Exterior) / Bumper (Front) / Front Bumper Assembly Repair Procedures

Removal and Installation
1.
Disconnect the battery negative ( - ) terminal.
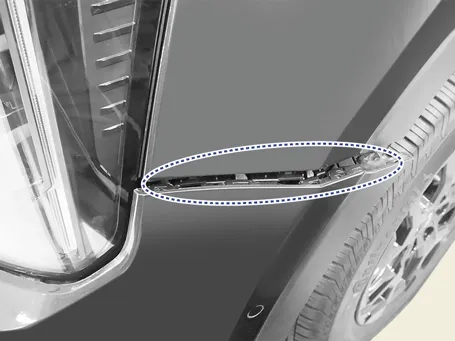
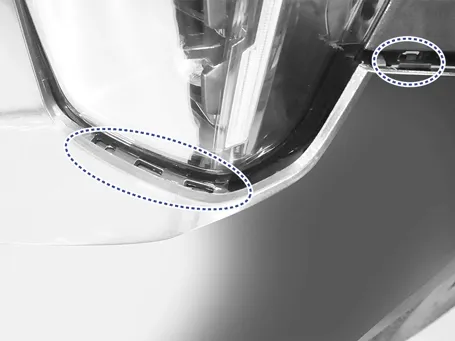
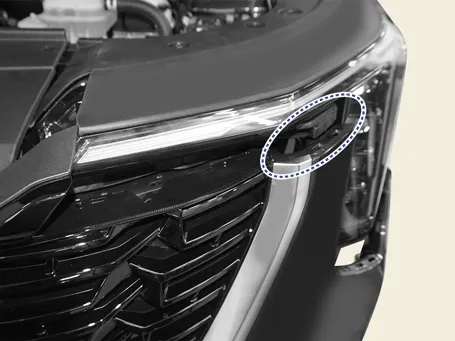
2.
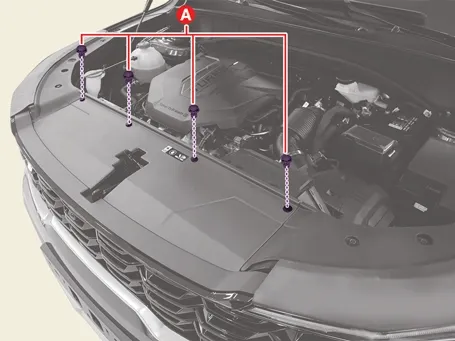
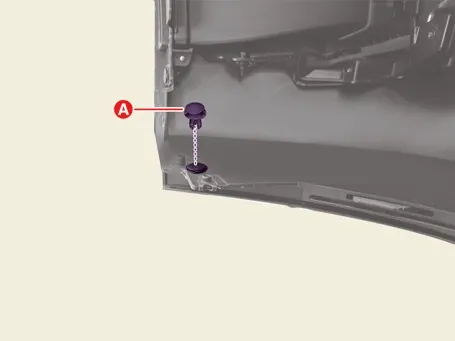
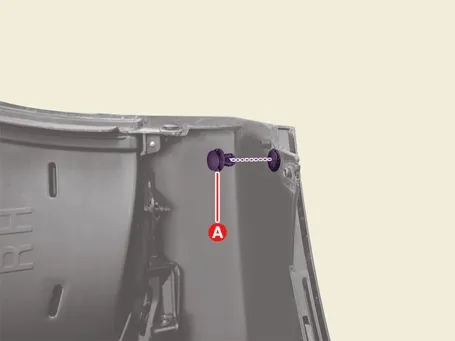
Remove the front bumper clips (A).

Body (Interior and Exterior) — Bumper (Front) / Front Bumper Assembly / Repair Procedures / Removal and Installation illustration

3.
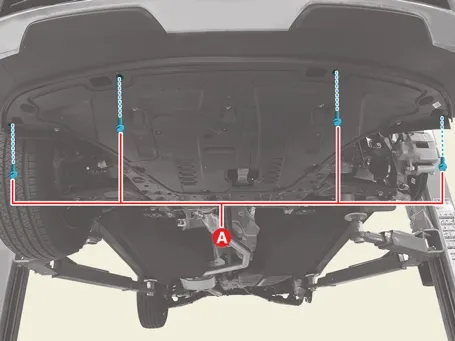
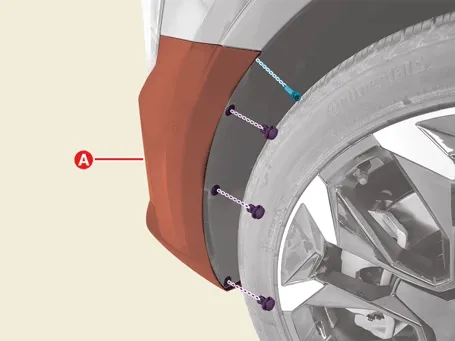
Remove the front bumper bolts (A).

Tightening torque :
7.8 - 11.8 N·m (0.8 - 1.2 kgf·m, 5.8 - 8.7 lb·ft)

Body (Interior and Exterior) — Bumper (Front) / Front Bumper Assembly / Repair Procedures / Removal and Installation illustration

4.
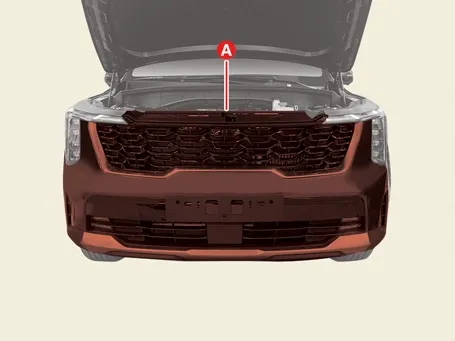
Remove the front bumper (A) after removing the clips and screws.

Body (Interior and Exterior) — Bumper (Front) / Front Bumper Assembly / Repair Procedures / Removal and Installation illustration

5.
Remove the front bumper assembly (A).

Body (Interior and Exterior) — Bumper (Front) / Front Bumper Assembly / Repair Procedures / Removal and Installation illustration

Body (Interior and Exterior) — Bumper (Front) / Front Bumper Assembly / Repair Procedures / Removal and Installation illustration

Body (Interior and Exterior) — Bumper (Front) / Front Bumper Assembly / Repair Procedures / Removal and Installation illustration

Body (Interior and Exterior) — Bumper (Front) / Front Bumper Assembly / Repair Procedures / Removal and Installation illustration

Information
Clip position :

Body (Interior and Exterior) — Bumper (Front) / Front Bumper Assembly / Repair Procedures / Removal and Installation illustration

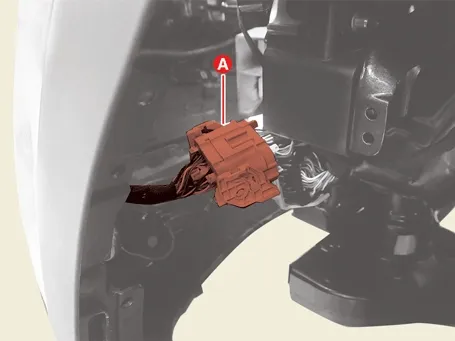
6.
Disconnect the front bumper main connector (A).

Body (Interior and Exterior) — Bumper (Front) / Front Bumper Assembly / Repair Procedures / Removal and Installation illustration

7.
Install in the reverse order of removal.
Disassembly
1.
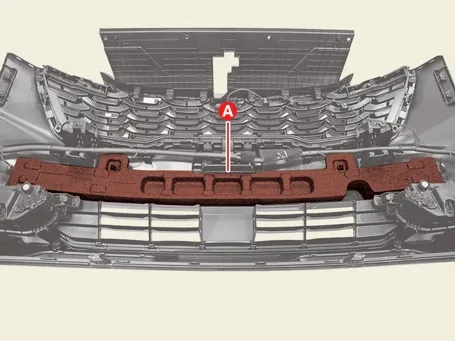
Remove the front bumper energy absorber (A).

Body (Interior and Exterior) — Bumper (Front) / Front Bumper Assembly / Repair Procedures / Disassembly illustration

2.
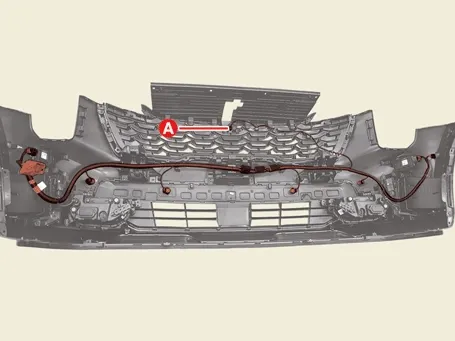
Remove the front bumper wiring harness (A).

Body (Interior and Exterior) — Bumper (Front) / Front Bumper Assembly / Repair Procedures / Disassembly illustration

3.
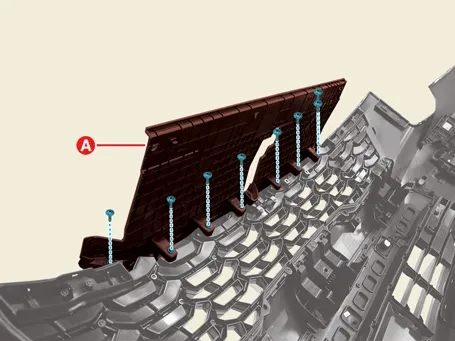
Remove the radiator grille upper cover (A) after removing the screws.

Body (Interior and Exterior) — Bumper (Front) / Front Bumper Assembly / Repair Procedures / Disassembly illustration

4.
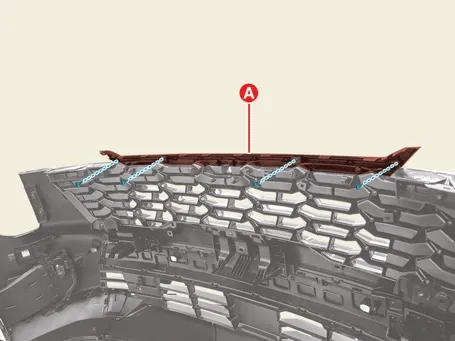
Remove the radiator grille upper piece (A) after removing the screws.

Body (Interior and Exterior) — Bumper (Front) / Front Bumper Assembly / Repair Procedures / Disassembly illustration

Body (Interior and Exterior) — Bumper (Front) / Front Bumper Assembly / Repair Procedures / Disassembly illustration

Information
Clip position :

Body (Interior and Exterior) — Bumper (Front) / Front Bumper Assembly / Repair Procedures / Disassembly illustration

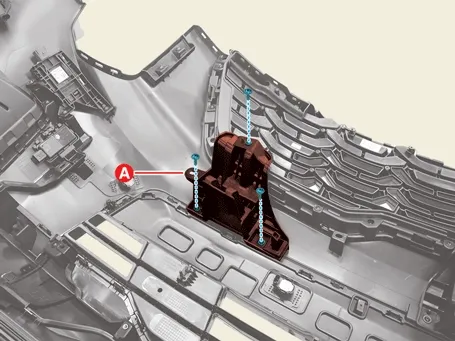
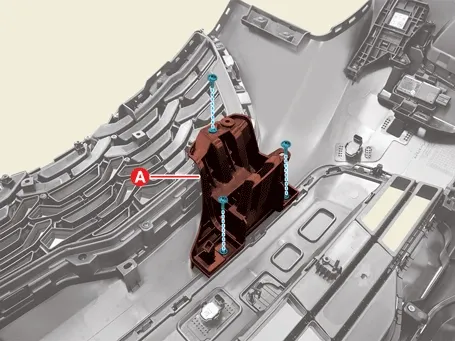
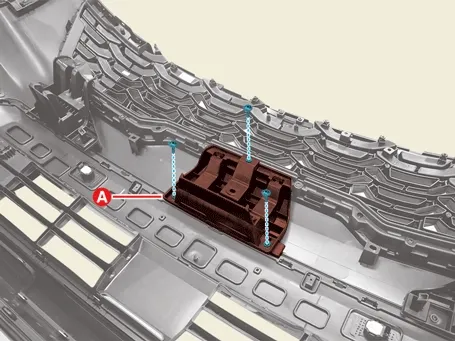
5.
Remove the front bumper reinforcement bracket (A) after removing the screws.

Body (Interior and Exterior) — Bumper (Front) / Front Bumper Assembly / Repair Procedures / Disassembly illustration

Body (Interior and Exterior) — Bumper (Front) / Front Bumper Assembly / Repair Procedures / Disassembly illustration

Body (Interior and Exterior) — Bumper (Front) / Front Bumper Assembly / Repair Procedures / Disassembly illustration

6.
Remove the radiator grille (A) after removing the screws.

Body (Interior and Exterior) — Bumper (Front) / Front Bumper Assembly / Repair Procedures / Disassembly illustration

Body (Interior and Exterior) — Bumper (Front) / Front Bumper Assembly / Repair Procedures / Disassembly illustration

7.
Remove the radiator grill molding (A).

Body (Interior and Exterior) — Bumper (Front) / Front Bumper Assembly / Repair Procedures / Disassembly illustration

Body (Interior and Exterior) — Bumper (Front) / Front Bumper Assembly / Repair Procedures / Disassembly illustration

Information
Clip position :

Body (Interior and Exterior) — Bumper (Front) / Front Bumper Assembly / Repair Procedures / Disassembly illustration

8.
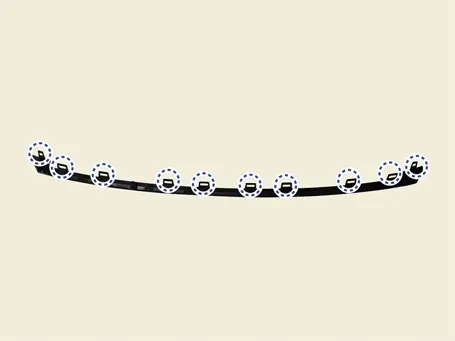
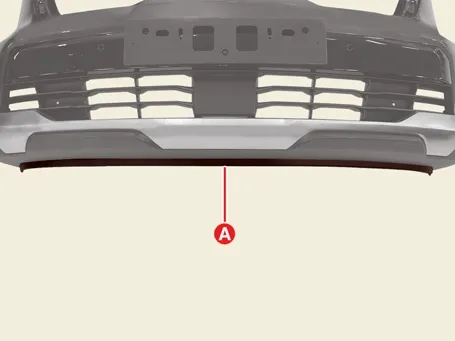
Remove the front bumper lip clips (A).

Body (Interior and Exterior) — Bumper (Front) / Front Bumper Assembly / Repair Procedures / Disassembly illustration

Body (Interior and Exterior) — Bumper (Front) / Front Bumper Assembly / Repair Procedures / Disassembly illustration

9.
Remove the front bumper lip (A).

Body (Interior and Exterior) — Bumper (Front) / Front Bumper Assembly / Repair Procedures / Disassembly illustration

Body (Interior and Exterior) — Bumper (Front) / Front Bumper Assembly / Repair Procedures / Disassembly illustration

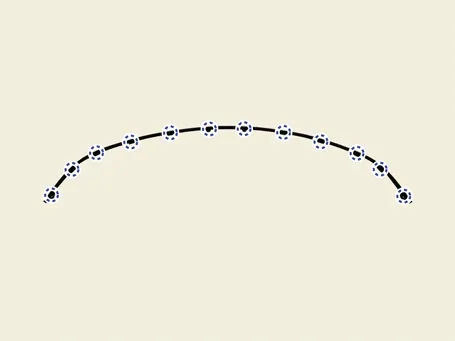
Information
Clip position :

Body (Interior and Exterior) — Bumper (Front) / Front Bumper Assembly / Repair Procedures / Disassembly illustration

10.
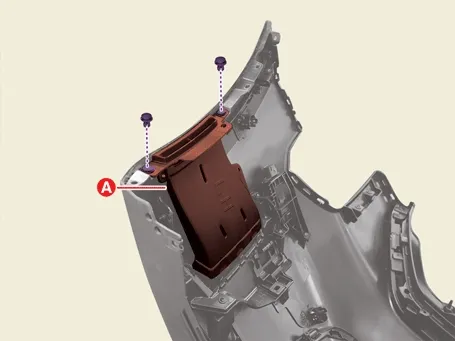
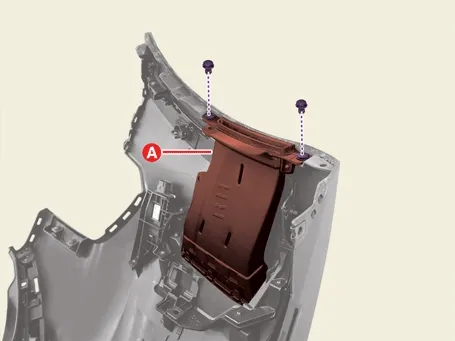
Remove the front air guard (A) after removing the clips.

Body (Interior and Exterior) — Bumper (Front) / Front Bumper Assembly / Repair Procedures / Disassembly illustration

Body (Interior and Exterior) — Bumper (Front) / Front Bumper Assembly / Repair Procedures / Disassembly illustration

11.
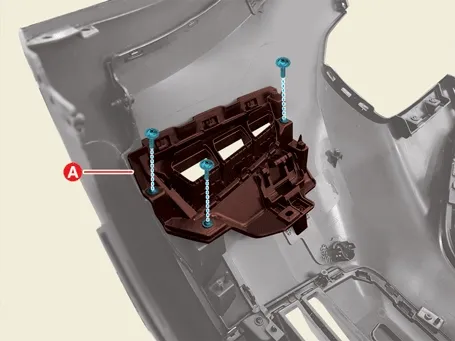
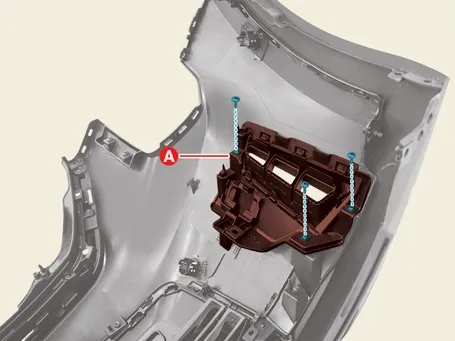
Remove the fog lamp bracket (A) after removing the screws.

Body (Interior and Exterior) — Bumper (Front) / Front Bumper Assembly / Repair Procedures / Disassembly illustration

Body (Interior and Exterior) — Bumper (Front) / Front Bumper Assembly / Repair Procedures / Disassembly illustration

12.
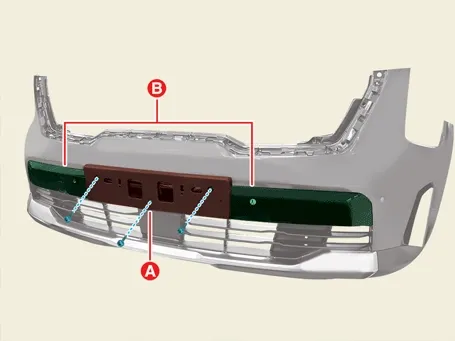
Remove the bumper grille piece (B) after removing the screws and license plate molding (A).

Body (Interior and Exterior) — Bumper (Front) / Front Bumper Assembly / Repair Procedures / Disassembly illustration

Body (Interior and Exterior) — Bumper (Front) / Front Bumper Assembly / Repair Procedures / Disassembly illustration

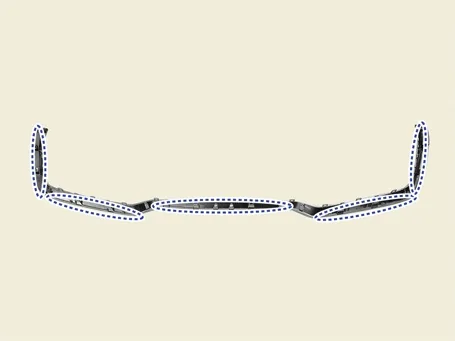
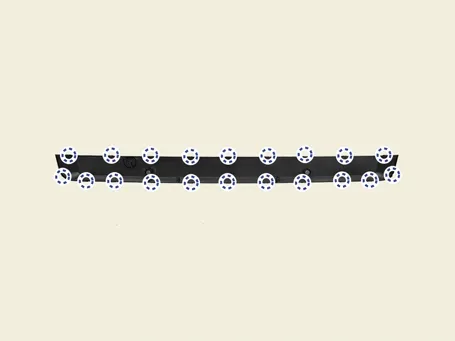
Information
Clip position :

Body (Interior and Exterior) — Bumper (Front) / Front Bumper Assembly / Repair Procedures / Disassembly illustration

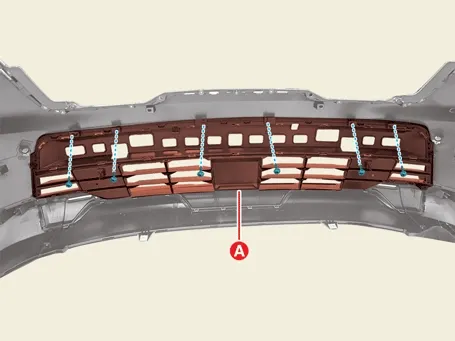
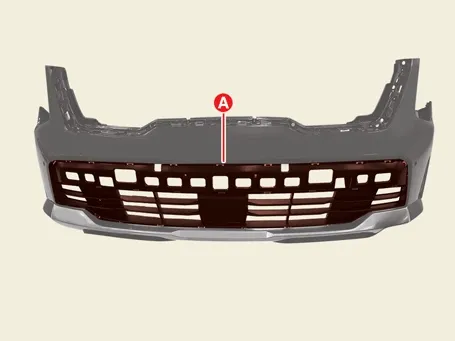
13.
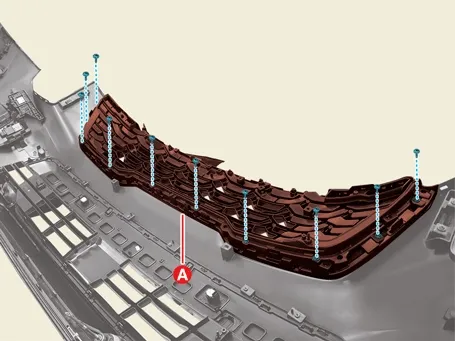
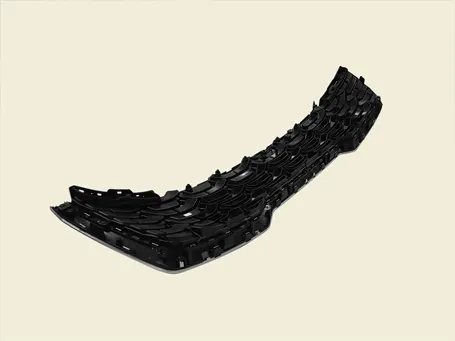
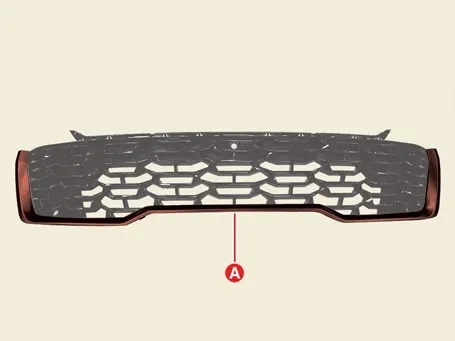
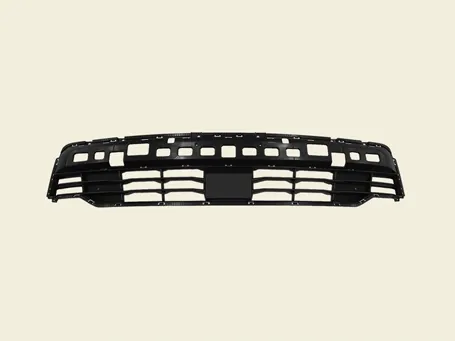
Remove the front bumper grille (A) after removing the screws.

Body (Interior and Exterior) — Bumper (Front) / Front Bumper Assembly / Repair Procedures / Disassembly illustration

Body (Interior and Exterior) — Bumper (Front) / Front Bumper Assembly / Repair Procedures / Disassembly illustration

Body (Interior and Exterior) — Bumper (Front) / Front Bumper Assembly / Repair Procedures / Disassembly illustration

14.
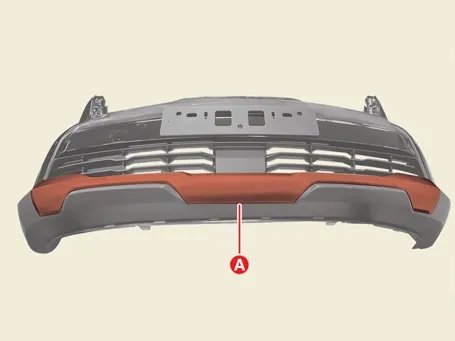
Remove the front bumper skid plate and lower cover (A).

Body (Interior and Exterior) — Bumper (Front) / Front Bumper Assembly / Repair Procedures / Disassembly illustration

15.
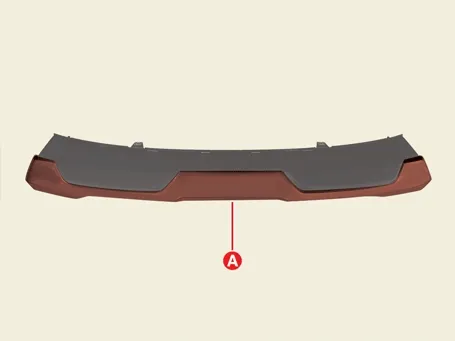
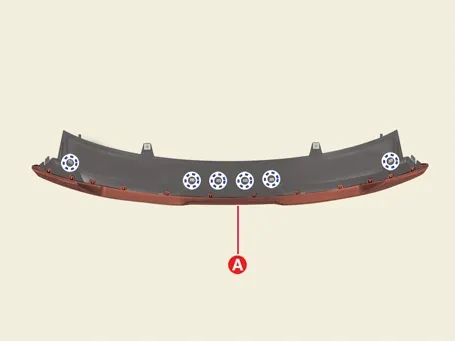
Remove the front bumper skid plate (A).

Body (Interior and Exterior) — Bumper (Front) / Front Bumper Assembly / Repair Procedures / Disassembly illustration

Body (Interior and Exterior) — Bumper (Front) / Front Bumper Assembly / Repair Procedures / Disassembly illustration

Information
Clip position :

Body (Interior and Exterior) — Bumper (Front) / Front Bumper Assembly / Repair Procedures / Disassembly illustration

Body (Interior and Exterior) — Bumper (Front) / Front Bumper Assembly / Repair Procedures / Disassembly illustration

Body (Interior and Exterior) — Bumper (Front) / Front Bumper Assembly / Repair Procedures / Disassembly illustration

16.
Reassemble in the reverse order of disassembly.
Components and Components Location
Component 1. Front Bumper Assembly2. Front Bumper Side Bracket 3. Front Bumper Beam4. Front Bumper Stiffener...
Front Bumper Beam Assembly Repair Procedures
Removal and Installation Front Bumper Beam 1. Remove the front bumper assembly. (Refer to Bumper (Front) - "Front Bumper Assembly") ...
See also:

Rear Disc Brake Removal
1. Remove the rear wheel & tire. Tightening torque: 88.3 ~ 107.9 N.m (9.0 ~ 11.0 kgf.m, 65.1 ~ 79.6 lb-ft) ...

Specification
Item Specification Rated Voltage DC 12.0V Operating voltage DC 10.7 ~ 15V Operating temperature -30 ~ 75 ...

PTC Heater Removal and Installation
Removal 1. Remove the heater unit. (Refer to Heater - "Heater Unit") 2. ...

Copyright © www.ksmanual.com 2014-2026 - 0.0591