 Kia Sorento: Airbag Module Disposal Procedure
| Airbag Module Disposal Procedure |
When scrapping a vehicle equipped with an airbag system such as an airbag or seat belt pretensioner, the airbag
must be deployed first. When deploying the airbag, it must be deployed by a skilled technician, and the used airbag
cannot be reused, so it must not be installed in another vehicle.
|
•
|
When scrapping a vehicle, the airbag should, in principle, be deployed while installed in the
vehicle. Do not remove the airbag except unavoidable circumstances.
|
|
•
|
If the airbag is removed from the vehicle due to airbag replacement (accident repair, warranty
repair, etc.), refer to the relevant manual and deploy it outside the vehicle. (Deploying the airbag
inside the vehicle may cause damage to the vehicle.)
|
|
•
|
Do not disassemble the airbag.
|
|
•
|
Be careful not to damage the airbag.
|
|
•
|
Be careful not to drop the airbag.
|
|
•
|
When deploying the airbag, deploy it at least 7 m (22.97 ft.) away from the airbag.
|
|
•
|
When deploying the airbag, always use the special tool and perform it in a place without electrical
noise.
|
|
|
•
|
If an undeployed airbag is accidentally deployed, it may cause serious injury, so it must be
disposed after deployment.
|
|
•
|
Deployment of the airbag must be performed on a level ground with no risk elements.
|
|
•
|
An explosion sound occurs when the airbag is deployed, perform it in a place where there is no
damage to the surroundings.
|
|
•
|
Smoke may occur when the airbag is deployed, perform the deployment of the airbag in area with good
ventilation and no smoke detector nearby.
|
|
•
|
The airbag is very hot after deploying, so wait at least 30 minutes and let it cool before touching
it.
|
|
•
|
Keep the deployed airbag away from water.
|
|
|
•
|
Wash hands thoroughly with soap after deploying, repacking, and disposal of the airbag.
|
|
•
|
Always wear protective gloves, goggles and earplugs when deploying the airbag.
|
|
Tools and Equipment Required for Disposal of Airbag Modules
Illustration
|
Name
|
Possible Cause
|
|

|
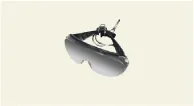
Gloves
|
|
|
|
Goggles
|
|
|

|
Earplugs
|
|
|
|
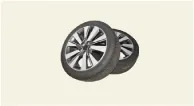
2 tires with wheels
|
(Top / Bottom)
|
|
|
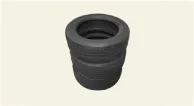
3 tires without the wheels
|
(Middle)
|
|
|
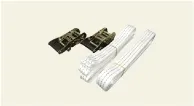
Rope Strap / Ratchet Strap
|
(Use for connecting the airbag equipment and tires according to the deployment instructions)
|
|
|
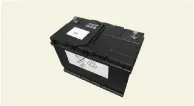
12 V battery
|
|
Deployed inside the vehicle
| 1. |
Disconnect the battery negative ( - ) terminal.
|
After disconnecting the battery negative ( - ) terminal, wait at least 3 minutes and 30 seconds.
|
|
| 2. |
Make sure the airbag is securely installed.
|
| 3. |
Prepare to deploy the airbag or seat belt pretensioner as follows.
| (1)
|
Disconnect the airbag or seat belt pretensioner connector to be deployed.
|
| (2)
|
Connect the deployment adapter to the airbag or seat belt pretensioner.
|
•
|
For the Driver Airbag (DAB), disconnect the connector, connect the deployment
adapter, and then reinstall it on the steering wheel.
|
|
•
|
When using the deployment adapter, use it appropriately according to the deployment
airbag.
|
|
–
|
DAB, PAB, CAB, BPT (0K57A - 3U100A)
|
|
|
|
| 4. |
Workers should be at least 7 meters away from the vehicle.
|
| 5. |
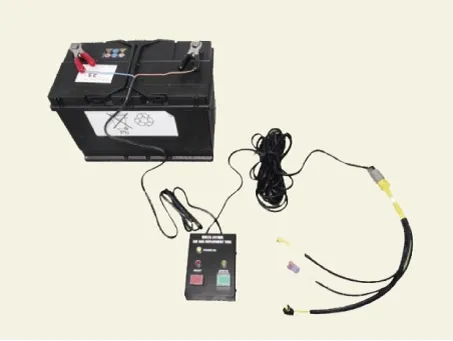
Connect the airbag deployment tool (0957A - 34100A) to the deployment adapter and then connect it to the
external battery.
| (2)
|
Airbag deployment tool (0957A - 34100A)
|
| (3)
|
Deployment adapter
|
|
| 6. |
Activate the switch of the airbag deployment tool to deploy the airbag.
| (1)
|
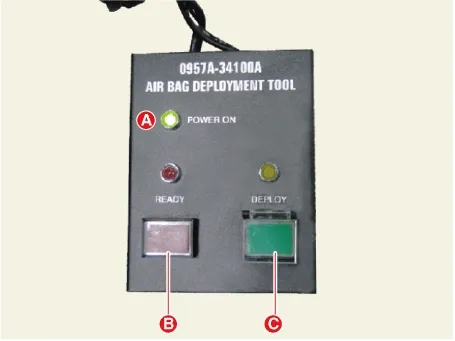
When connecting to an external battery normally, POWER ON(1) is turned on.
|
| (2)
|
If the READY (2) button illuminates while pressing the READY (2) button, press DEPLOY (3) button to
deploy the airbag.
|
When the airbag is deployed, loud noise is generated, visually confirmed, and after rapid
inflation, it contracts slowly.
|
|
|
| 7. |
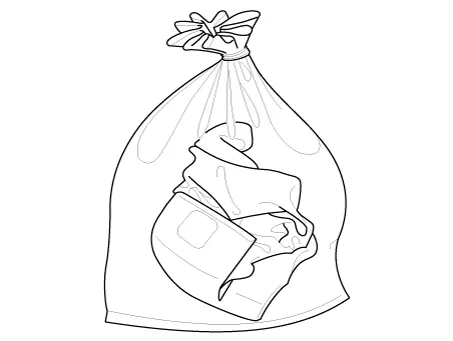
Place the deployed airbag in a sturdy plastic bag and sealed securely, then dispose it.
|
Deployment outside of the vehicle
| 1. |
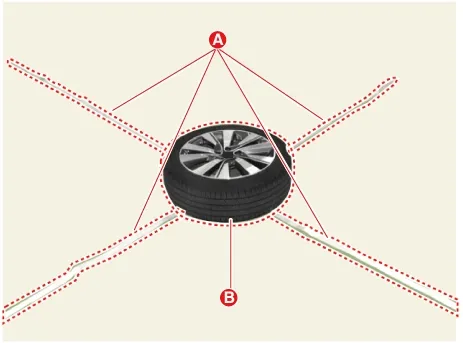
After spreading the rope (A) on the floor in a cross shape, put the tire (B) equipped with the wheel on the
floor.
|
| 2. |
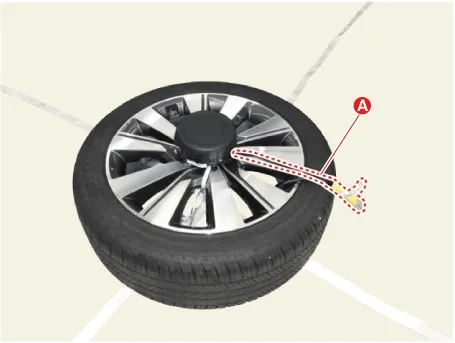
Connect the deployment adapter (A) (0K57A - 3U100A) to the airbag or pretensioner.
|
•
|
When using the deployment adapter, use it appropriately according to the deployment airbag.
|
|
–
|
DAB, PAB, CAB, BPT (0K57A - 3U100A)
|
|
|
| 3. |
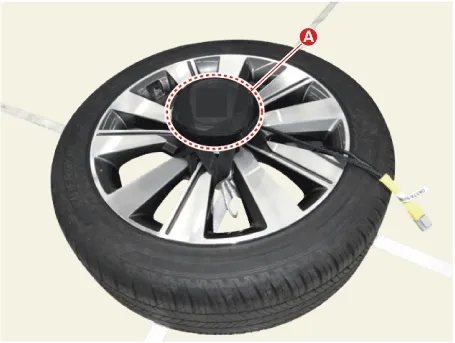
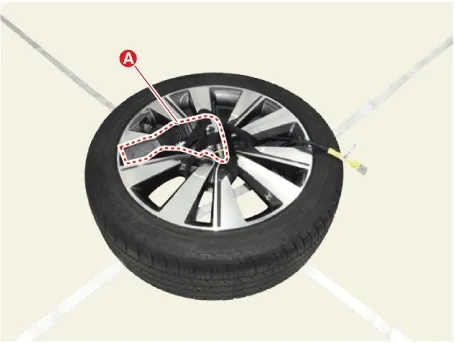
Fix the airbag or pretensioner (A) to the wheel.
[Airbag]
|
If the airbag deployment surface faces downward instead of upward, the airbag may spring up and
cause serious injury to the worker.
|
[Pretensioner]
|
Install the end of the piston tube of the anchor pretensioner, facing the floor.
|
|
| 4. |
After putting the three waste tires (A), put the tire (B) with the wheel on it.
|
| 5. |
Fix the tire by using the ratchet strap (C).
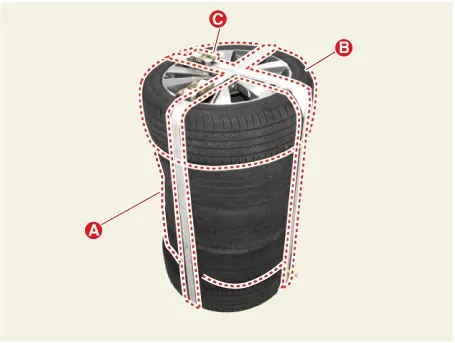
|
| 6. |
After connecting the battery, connect the airbag deployment tool (0957A - 34100A) to the deployment
adapter.
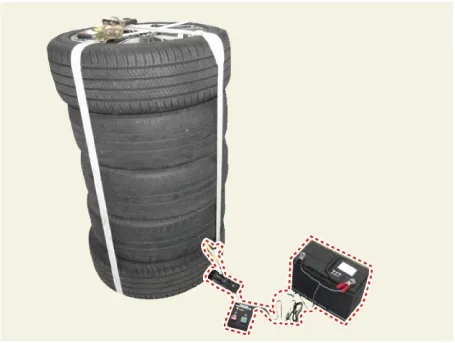
|
| 7. |
Activate the switch of the airbag deployment tool to deploy the airbag.
| (1)
|
When connecting to an external battery normally, POWER ON(1) is turned on.
|
| (2)
|
If the READY (2) button illuminates while pressing the READY (2) button, press DEPLOY (3) button to
deploy the airbag.
|
When the airbag is deployed, loud noise is generated, visually confirmed, and after rapid
inflation, it contracts slowly.
|
|
|
| 8. |
Place the deployed airbag in a sturdy plastic bag and sealed securely, then dispose it.
|
Damaged Airbag (Undeployed Airbag) Disposal Procedure
| 1. |
Disconnect the battery negative ( - ) terminal.
|
After disconnecting the battery negative ( - ) terminal, wait at least 3 minutes and 30 seconds.
|
|
| 2. |
If necessary, remove the damaged airbag (undeployed airbag) from the vehicle.
|
For airbags with wires, twist the wires to create a short circuit.
|
|
| 3. |
Place the removed airbag in a sturdy plastic bag or box and sealed tightly, and then dispose it.
|
If storing the damaged airbag individually without return or disposal, write a warning message on
the plastic bag.
|
|
Installation
1.
Set the clock spring in a neutral position before installation.
–...
See also:
Power windows
The ignition switch must be in the ON position for power windows to operate.
Each door has a power window switch that controls the door's window.
The driver has a power window lock button which ...
Front Body C
* These dimensions indicated in this figure are actual-measurement
dimensions. [ Unit : mm (inch) ]
...
Special Service Tools
Special Service Tools
Tool Name / Number
Illustration
Description
Ball joint p ...



 Clock Spring Installation
 SRSCM
