 Kia Sorento: Cylinder Head Installation
Second Generation XM (2011-2025) / Kia Sorento XM 2011-2025 Service Manual / Engine Mechanical System / Cylinder Head Assembly / Cylinder Head Installation
|

| 1. |
Install the cylinder head gasket (A) on the cylinder block.
|
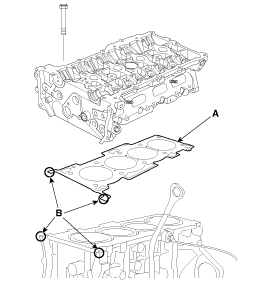
| 2. |
Place the cylinder head carefully in order not to damage the gasket
with the bottom part of the end.
|
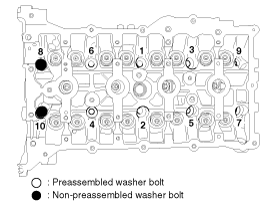
| 3. |
Install cylinder head bolts.
|
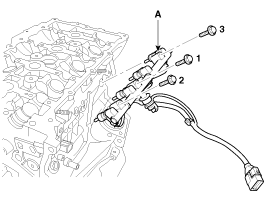
| 4. |
Install the injector & rail module (A).
Pre-tighten the bolts and then tighten the bolts with the specified
torque in the sequence shown.
|
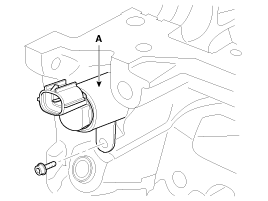
| 5. |
Install the intake CMPS (Camshaft position sensor) (A).
|
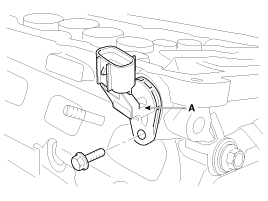
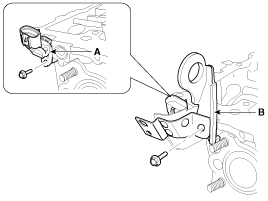
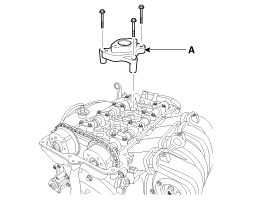
| 6. |
Install the exhaust CMPS (Camshaft position sensor) (A) and the engine
hanger (B).
|
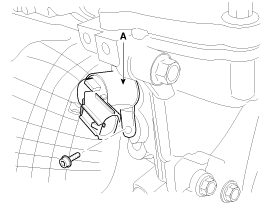
| 7. |
Install the intake OCV (Oil control valve) (A).
|
| 8. |
Install the exhaust OCV (Oil control valve) (A).
|

| 9. |
Install the cmashaft.
|
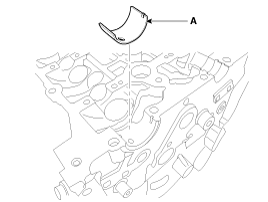
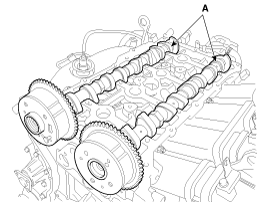

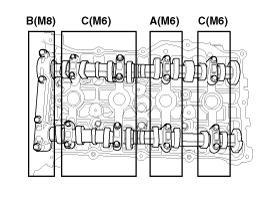
| 10. |
Install camshaft bearing caps (A) in their proper locations.
Tightening order
Group A → Group B → Group C.
|
| 11. |
Install the timming chain.
(Refer to Timing System - "Timing Chain")
|
| 12. |
Install the timming chain cover.
(Refer to Timing System - "Timing Chain Cover")
|
| 13. |
Install the high pressure fuel pump bracket(A).
|
| 14. |
Install the cylinder head cover.
(Refer to Cylinder Head Assembly - "Cylinder Head Cover")
|
| 15. |
Install the exhaust manofold.
(Refer to Intake And Exhaust System - "Exhaust Manifold")
|
| 16. |
Install the intake manofold.
(Refer to Intake And Exhaust System - "Intake Manifold")
|
 Cylinder Head Reassembly
Thoroughly clean all parts to be assembled.
Before installing the parts, apply fresh engine oil to all sliding and
...
 Cylinder Block
...
See also:
Timing Chain Cover Removal
ŌĆó
Use fender covers to avoid damaging painted surfaces.
ŌĆó
...
Parking Brake Lever Assembly Installation
1.
Install the parking brake lever assembly (A).
Tightening torque :
19.6 ~ 29.4 N.m (2.0 ~ 3.0 kgf.m, 14.5 ~ 21.7 lb-ft)
...
Front Driveshaft Removal and Installation
1.
Remove the front wheel and tire (A) from front hub .
Tightening torque:
88.2 ~ 107.8 N.m (9.0 ~ 11.0 kgf.m, 65.0 ~ 79.5 lb-ft)
...
Categories
- Home
- First Generation
- Second Generation
- Kia Sorento XM 2011-2025 Owners Manual
- Kia Sorento XM 2011-2025 Service Manual

Copyright ® www.ksmanual.com 2014-2025