 Kia Sorento: Rear Seat Belt Replacement
Second Generation XM (2011-2025) / Kia Sorento XM 2011-2025 Service Manual / Body (Interior and Exterior) / Seat Belt / Rear Seat Belt Replacement
Second Row Seat Belt Replacement
|

| 1. |
Remove the second row seat assembly.
|
| 2. |
Remove the third row seat assembly.
|
| 3. |
Remove the rear door scuff trim.
|
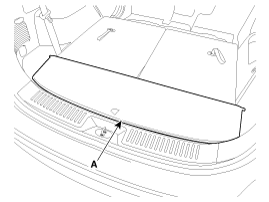
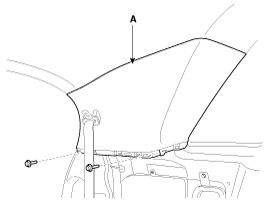
| 4. |
Remove the luggage box trim (A).
|
| 5. |
Remove the luggage box partition trim (A).
|
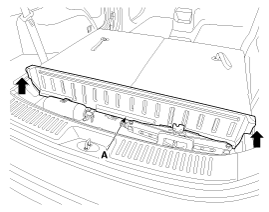
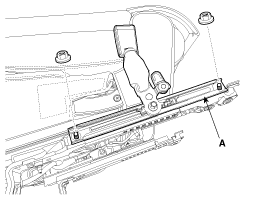
| 6. |
After loosening the mounting screws, then remove the rear transverse
trim (A).
|
| 7. |
After loosening the mounting bolt, then remove the second row
seat belt lower anchor (A).
|
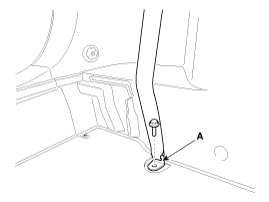
| 8. |
After loosening the mounting bolt, then remove the third row seat
belt lower anchor (A).
|
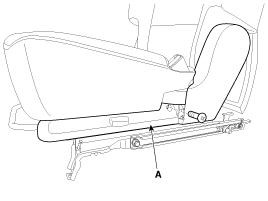
| 9. |
After loosening the mounting screws, then remove the luggage side
trim (A).
|
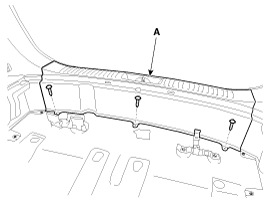
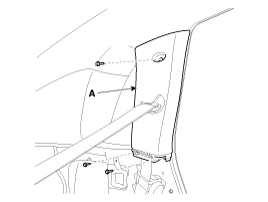
| 10. |
After loosening the mounting bolt, then remove the C pillar trim
(A).
|
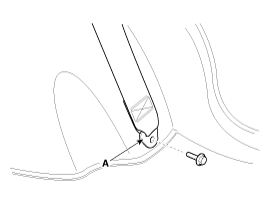
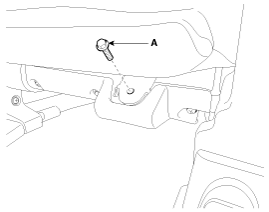
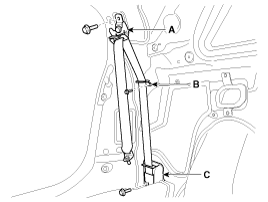
| 11. |
After loosening the mounting bolt, then remove the second row
seat belt upper anchor (A).
|
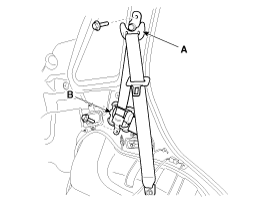
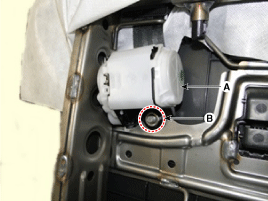
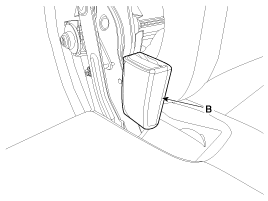
| 12. |
After loosening the mounting bolt, then remove the second row
seat belt retractor (B).
|
| 13. |
Install in the reverse order of removal.
|

Second Row Center Seat Belt Retractor Replacement
| 1. |
Remove the second row seat back cover [LH].
|
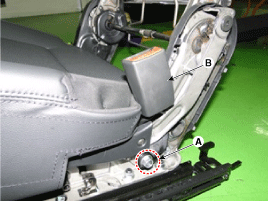
| 2. |
Loosen the second row center seat belt lower anchor mounting bolt
(A).
|
| 3. |
After loosening the mounting nut (B), then remove the second row
center seat belt retractor (A).
|
| 4. |
Install in the reverse order of removal.
|
Second Row Seat Belt Buckle Assembly
|

| 1. |
Place the second row seat assembly [LH] to the rear and second
row seat assembly [RH] to the front.
(Refer to Rear Seat - "Rear Seat Assembly")
|
| 2. |
Seperate the second row seat belt buckle and second row seat assembly
[LH] by removing the mounting bolt (C).
|
| (LH) |
| 1. |
Remove the second row seat assembly [LH].
(Refer to Rear Seat - "Rear Seat Assembly")
|
| 2. |
After loosening the mounting bolt (A), then remove the second
row seat belt buckle [LH] (B).
|
| 3. |
Install in the reverse order of removal.
|
| (Center) |
| 1. |
Remove the second row seat assembly [RH].
(Refer to Rear Seat - "Rear Seat Assembly")
|
| 2. |
After loosening the mounting nuts, then remove the second row
center seat belt buckle rail (A).
|
| 3. |
Install in the reverse order of removal.
|
| (RH) |
| 1. |
Remove the second row seat assembly [RH].
(Refer to Rear Seat - "Rear Seat Assembly")
|
| 2. |
After loosening the mounting screw, then remove the rear seat
shield inner cover (A).
|
| 3. |
After loosening the mounting bolt (A), then remove the second
row seat belt buckle [RH] (B).
|
| 4. |
Install in the reverse order of removal.
|
Third Row Seat Belt Retractor Replacement
| 1. |
Remove the second row seat assembly.
|
| 2. |
Remove the third row seat assembly.
|
| 3. |
Remove the rear door scuff trim.
|
| 4. |
Remove the luggage box trim (A).
|
| 5. |
Remove the luggage box partition trim (A).
|
| 6. |
After loosening the mounting screws, then remove the rear transverse
trim (A).
|
| 7. |
After loosening the mounting bolt, then remove the second row
seat belt lower anchor (A).
|
| 8. |
After loosening the mounting bolt, then remove the third row seat
belt lower anchor (A).
|
| 9. |
After loosening the mounting screws, then remove the luggage side
trim (A).
|
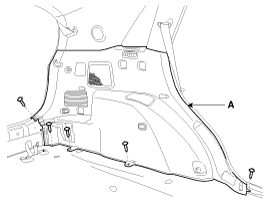
| 10. |
After loosening the mounting bolt, then remove the rear pillar
trim (A).
|
| 11. |
After loosening the mounting bolt, then remove the third row seat
belt upper anchor (A).
|
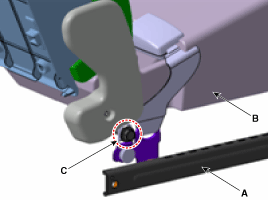
| 12. |
After loosening the mounting bolt, then remove the webbing guide
(B).
|
| 13. |
After loosening the mounting bolt, then remove the third row seat
belt retractor (C).
|
| 14. |
Install in the reverse order of removal.
|
Third Row Seat Belt Buckle Replacement
| 1. |
Remove the third row seat assembly.
|
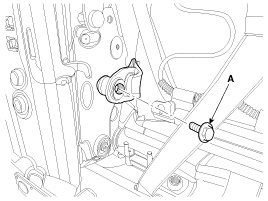
| 2. |
After loosening the mounting bolt, then remove the third row seat
belt buckle (A).
|
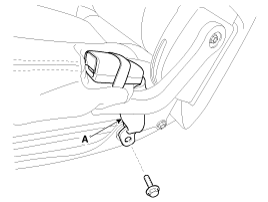
| 3. |
Install in the reverse order of removal.
|
 Front Seat Belt Replacement
Front Seat Belt Replacement
ŌĆó
When installing the belt, make sure not to damaged the
...

See also:
Troubleshooting
Problem Symptoms Table
Before replacing or repairing air conditioning components, first determine
if the malfunction is due to the refrigerant charge, air flow or compressor.
Us ...
Seat Belt Buckle Switch (BS) Description
The SRSCM shall monitor the status of the driver and front passenger seat
belt buckle. The SRSCM provides one pin each for the driver and front passenger
seat belt buckle status input. The se ...
Troubleshooting
ŌĆó
The battery must be in good condition and fully charged
for this troubleshooting.
...
Categories
- Home
- First Generation
- Second Generation
- Kia Sorento XM 2011-2025 Owners Manual
- Kia Sorento XM 2011-2025 Service Manual

Copyright ® www.ksmanual.com 2014-2025