 Kia Sorento: Rear Bumper Replacement
Second Generation XM (2011-2025) / Kia Sorento XM 2011-2025 Service Manual / Body (Interior and Exterior) / Bumper / Rear Bumper Replacement
|

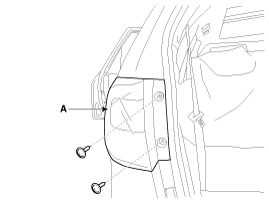
| 1. |
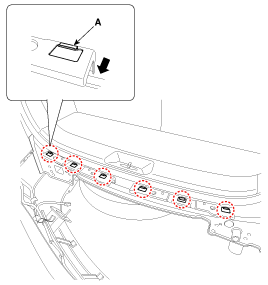
After loosening the mounting screws, then remove the rear combination
lamp (A).
|
| 2. |
Disconnect the rear combination lamp connector (A).
|

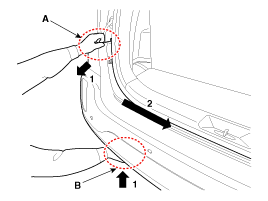
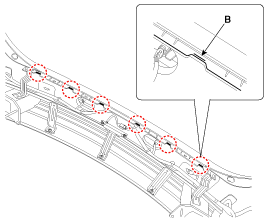
| 3. |
Loosen the rear bumper upper mounting clips and screw.
|
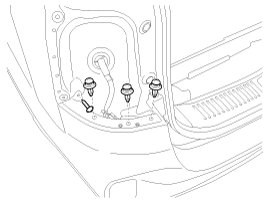
| 4. |
Loosen the rear bumper lower mounting clips.
|
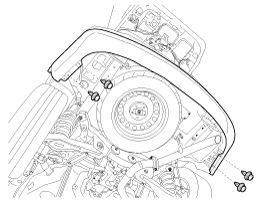
| 5. |
Loosen the mounting bolts.
|
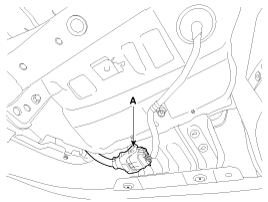
| 6. |
Disconnect the rear bumper main connector (A).
|
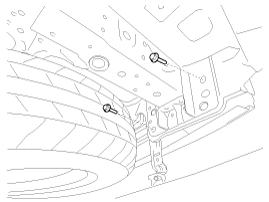
| 7. |
After loosening the mounting screws and clip, then remove the
rear mud guard (A).
|
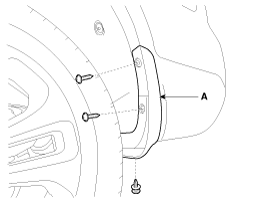
| 8. |
After loosening the rear bumper side's mounting screw and clip,
then disconnect the side's.
|
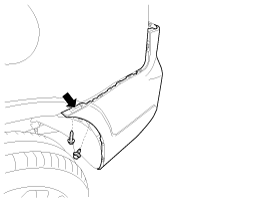
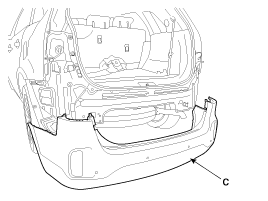
| 9. |
Remove the rear bumper assembly (C).
[LH]
[RH]
|

| 10. |
Install in the reverse order of removal.
|
 Rear Bumper Components
1. Rear bumper cover
2. Rear bumper lower bracket [RH]
3. Rear bumper lower bracket [LH]
4. Rear bumper side bracket [RH]
5. Rear bumper side bracket [LH]
...

See also:
Component
...
Audio system
✽ NOTICE
If you install an after market HID head lamp, your vehicleŌĆÖs audio and electronic
device may malfunction.
Antenna
Your vehicle uses a roof antenna to receive AM or/and FM broad ...
Fuel Pump Motor Installation
1.
Install in the reverse order of removal.
...
Categories
- Home
- First Generation
- Second Generation
- Kia Sorento XM 2011-2025 Owners Manual
- Kia Sorento XM 2011-2025 Service Manual

Copyright ® www.ksmanual.com 2014-2025