 Kia Sorento: Intake Manifold Removal and Installation
Second Generation XM (2011-2026) / Kia Sorento XM 2011-2026 Service Manual / Engine Mechanical System / Intake And Exhaust System / Intake Manifold Removal and Installation
| 1. |
Disconnect the battery negative terminal.
|
| 2. |
Remove the air cleaner assembly.
(Refer to Intake And Exhaust System - "Air Cleaner")
|
| 3. |
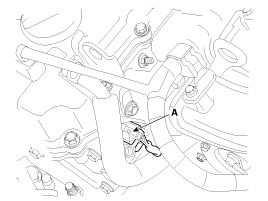
Disconnect the intake OCV (Oil control valve) connector (A).
|
| 4. |
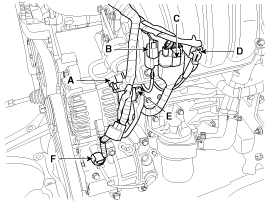
Disconnect the VIS (Variable intake system) connector (A), the OPS (Oil
pressure switch) connector (B), the injector extension connector (C),
the knock sensor connector (D), the alternator connector (E) and the
air compressor connector (F).
|
| 5. |
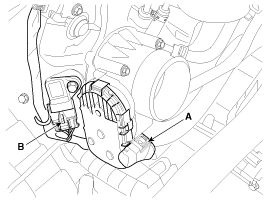
Disconnect the ETC (Electronic throttle control) connector (A) and MAPS
(Manifold absolute pressure sensor) & IATS (Intake air temperature sensor)
connector (B).
|
| 6. |
Disconnect the PCV (Positive crankcase ventilation) hose (A).
|
| 7. |
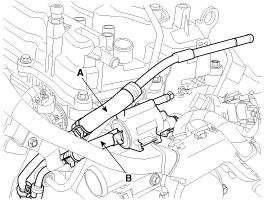
Disconnect the vacuum hose (A) and PCSV (Purge control solenoid valve)
hose (B).
|
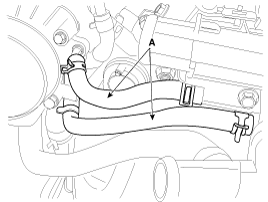
| 8. |
Disconnect the throttle body coolant hoses (A).
|
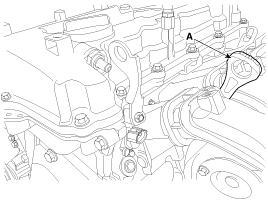
| 9. |
Remove the oil level gauge (A).
|
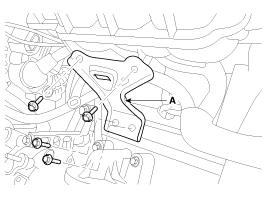
| 10. |
Remove the intake manifold stay (A).
|
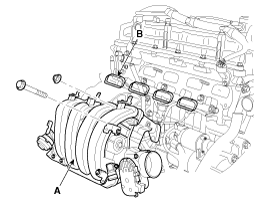
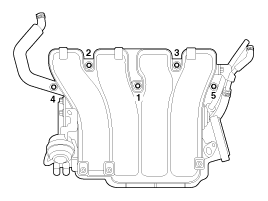
| 11. |
Remove the intake manifold (A) with the gasket (B).
When installing the intake manifold, tighten the bolts and nuts with
pre-torque first, and then tighten the bolts and nuts with specified
torque in the sequence shown.
|
| 12. |
Install in the reverse order of removal.
|
 Intake Manifold Components
1. Intake manifold assembly
2. Electronic throttle body
3. Intake manifold stay
4. Intake manifold gasket
...
 Exhaust Manifold Components
1. Heat protector
2. Exhaust manifold
3. Exhaust manifold gasket
4. Exhaust manifold stay
...
See also:
Components (1)
1. Driver Airbag (DAB)
2. Steering Wheel
3. Clock Spring
4. Seat Belt Pretensioner (BPT)
5. Front Side Impact Sensor (FSIS)
6. Side Airbag (SAB)
7. Passenger Airbag (PAB)
...
Drive Belt Inspection
1.
Visually check the belt for excessive wear, frayed cords etc.
If any defect has been found, replace the drive belt.
...
Components
1. Piston ring
2. Snap ring
3. Piston
4. Connecting rod
5. Connecting rod upper bearing
6. Piston pin
7. Connecting rod lower bearing
8. Connecting rod bearing cap ...
Copyright ® www.ksmanual.com 2014-2026

