 Kia Sorento: Temperature Control Actuator Replacement
Second Generation XM (2011-2026) / Kia Sorento XM 2011-2026 Service Manual / Heating,Ventilation And Air Conditioning / Heater / Temperature Control Actuator Replacement
| [Driver's side] |
| 1. |
Disconnect the negative (-) battery terminal.
|
| 2. |
Using a screwdriver or remover, remove the driver's side crash
pad side cover.
|
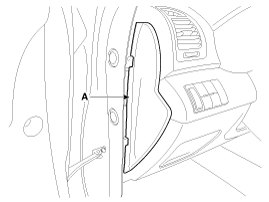
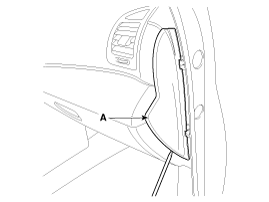
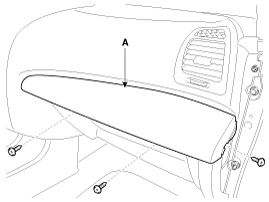
| 3. |
After loosening the mounting screws, remove the crash pad lower
panel (A).
|
| 4. |
Push the lock pin (B), disconnect the diagnosis connector (C).
|
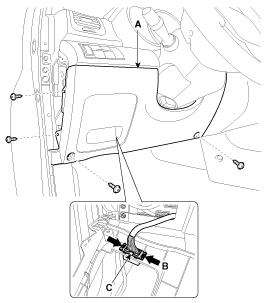
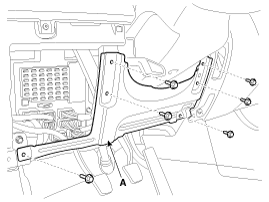
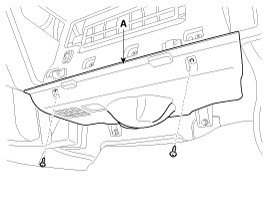
| 5. |
After loosening the mounting bolts, then remove the reinforce
panel (A).
|
| 6. |
Remove the driver's side shower duct after loosening the screw.
|
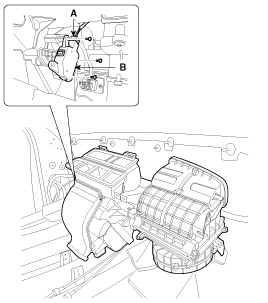
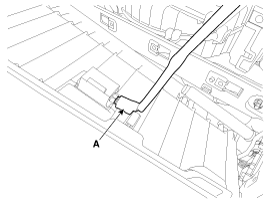
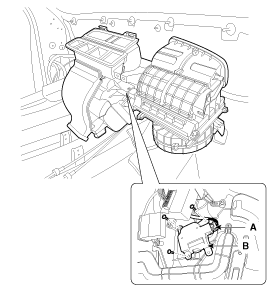
| 7. |
Disconnect the temperature control actuator connector (A).
|
| 8. |
Remove the temperature control actuator (B) after loosening the
mounting screws.
|
| 9. |
Install in the reverse order of removal.
|
| [Passenger's side] |
| 1. |
Disconnect the negative (-) battery terminal.
|
| 2. |
Remove the cowl side trim.
(Refer to Body - "Crash Pad")
|
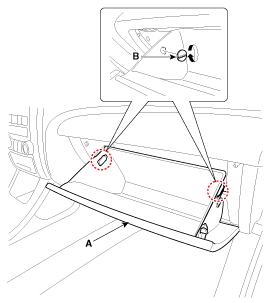
| 3. |
Using a screwdriver or remover, remove the crash pad side cover
(A).
|
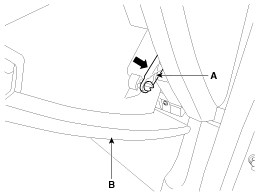
| 4. |
Disconnect the stopper (B) from the glove box (A).
|
| 5. |
Disconnect the air damper (A) from the glove box (B).
|
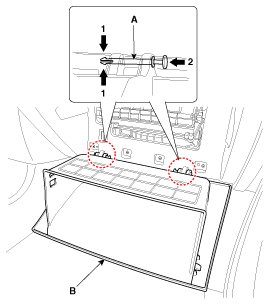
| 6. |
Disconnect the pins (A) and then remove the glove box (B).
|
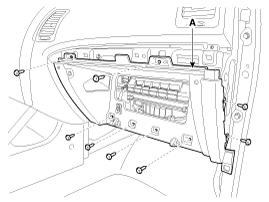
| 7. |
After loosening the mounting screws, then remove the crash pad
side garnish [RH] (A).
|
| 8. |
After loosening the mounting screws, then remove the crash pad
under cover (A).
|
| 9. |
After loosening the mounting screws, then remove the glove box
housing (A).
|
| 10. |
Disconnect the glove box lamp connector (A).
|
| 11. |
Disconnect the connector (A) and then remove the temperature control
actuator (B) after loosening the mounting screws.
|
| 12. |
Install in the reverse order of removal.
|
 Temperature Control Actuator Inspection
1.
Turn the ignition switch OFF.
2.
Disconnect the temperature control actuator connector.
3.
Verify that the t ...
 Mode Control Actuator Description
The mode control actuator is located at the heater unit.
It adjusts the position of the mode door by operating the mode control
actuator based on the signal of the A/C control unit. Pressing ...
See also:
Fluid Service Adjustment Procedure
Oil level Check
A check of ATF level is not normally required during scheduled
services. If an oil leak is ...
Failure Diagnosis
1.
In principle, ESC and TCS controls are prohibited in case of ABS
failure.
2.
When ESC or TCS fails, only the failed system control is pr ...
Battery saver function
The purpose of this feature is to prevent the battery from being discharged
if the lights are left in the ON position. The system automatically shuts off
the parking lights 30 seconds after the ...
Categories
- Home
- First Generation
- Second Generation
- Kia Sorento XM 2011-2026 Owners Manual
- Kia Sorento XM 2011-2026 Service Manual

Copyright ® www.ksmanual.com 2014-2026